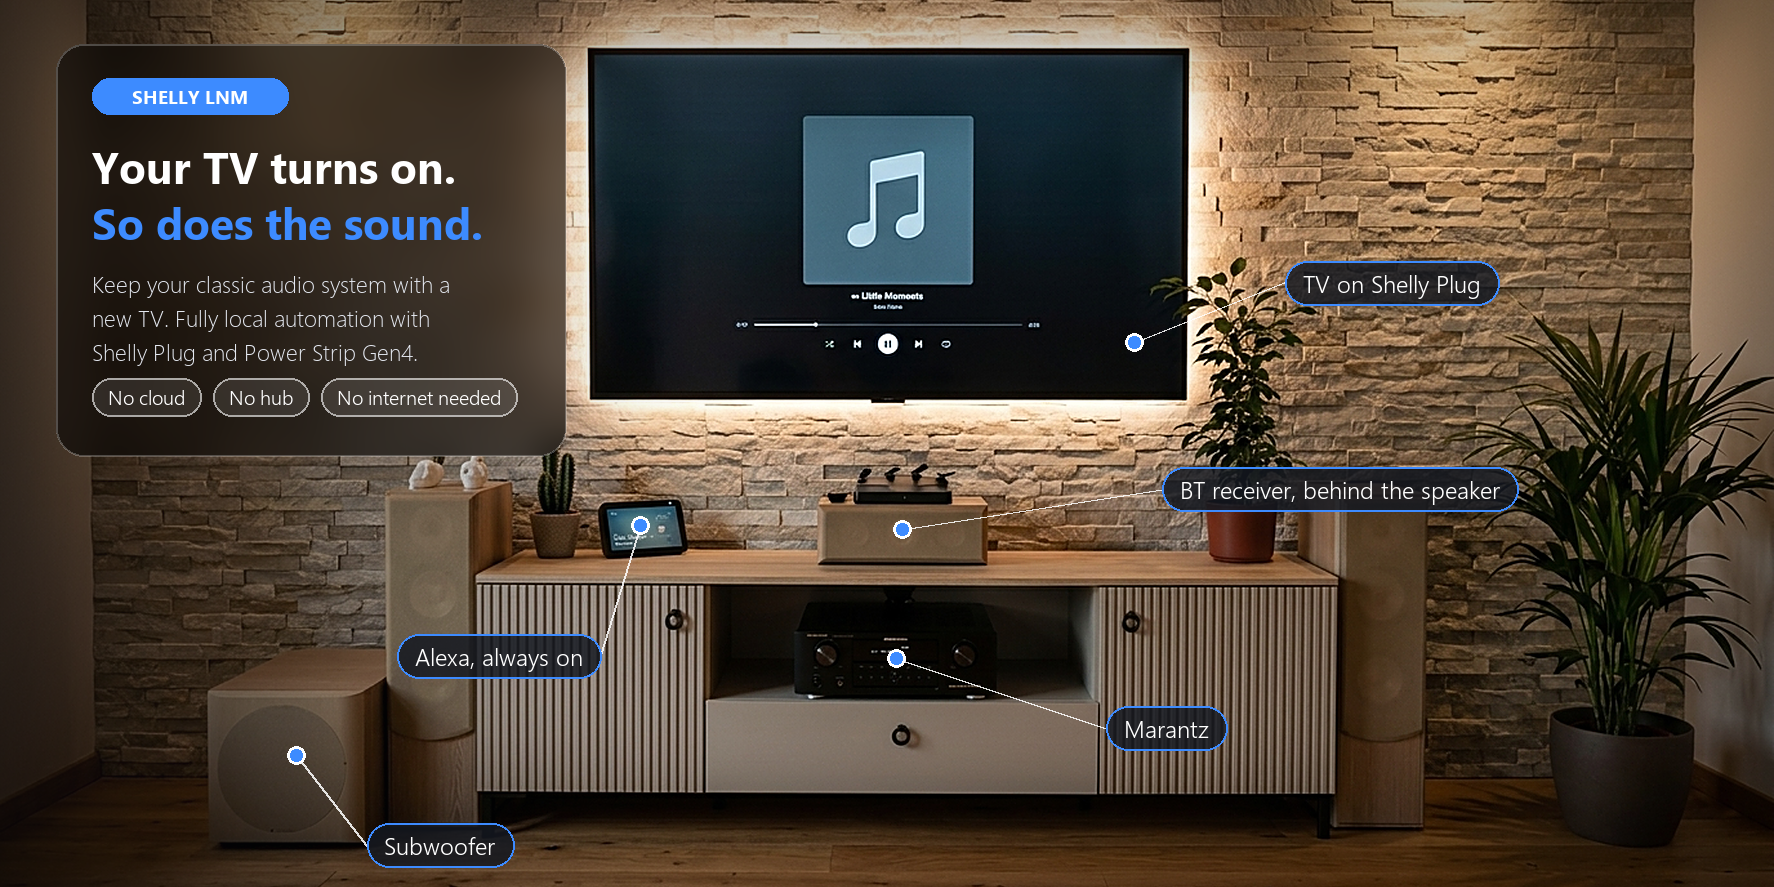
Switch a TV sound system on and off automatically with the TV, using a Shelly Plug, a Shelly Power Strip Gen4 and Shelly Local Network Messaging (LNM). This guide covers the LNM setup, the follower script, choosing power thresholds, and adding more audio devices such as a subwoofer.
Overview
A TV sound system usually has several parts with their own power switches: an amplifier or AV receiver, a Bluetooth receiver, a subwoofer. Left on, they draw power around the clock. Switched off, someone has to turn each one on before watching.
This guide shows how to make the audio system follow the TV. When the TV turns on, the audio devices turn on. When the TV goes to standby, they turn off.
The solution uses:
-
Shelly Plug for the TV (sender)
-
Shelly Power Strip Gen4 for the audio devices (receiver)
-
Shelly Local Network Messaging (LNM)
-
Shelly Script
-
Shelly Smart Control
The plug and the strip talk to each other directly over the local network. No cloud, hub, or server is involved, and the automation keeps working without an internet connection. If LNM is new to you, the official Local Network Messaging setup guide explains the basics.
The same pattern works for any setup where one device should follow the power state of another: a PC and its monitors and speakers, a workbench and its extraction fan, a coffee machine and its grinder.
Important
LNM is a preview feature. The API may change in future firmware.
The power values in this guide come from one specific TV. Measure your own TV before you rely on them.
The story behind this setup
This solution started with a common situation: a new TV and an older audio system that still sounds great.
The new TV sends audio only over HDMI and Bluetooth. The amplifier, an older Marantz receiver, has no HDMI input. Replacing a good amplifier just to match the TV did not make sense, so a Bluetooth receiver became the bridge:
TV | | Bluetooth audio v Bluetooth receiver | | cable v Marantz receiver | v Speakers The sound worked, but a new problem appeared. Without HDMI there is no HDMI-CEC link, so the TV cannot switch the receiver on or off. The Bluetooth receiver and the amplifier stayed on all the time, whether anyone was watching or not.
The goal became clear:
-
The audio system switches on and off with the TV, with no extra remote and no extra button.
-
The old equipment keeps working as it is, with no modifications.
-
It never stops because of an internet outage or a remote service.
Shelly Local Network Messaging met all three. Once the Bluetooth receiver and the amplifier followed the TV reliably, a subwoofer came next. It cannot be switched on by a signal from the old receiver, so it joined the same automation on a free socket of the strip, with a one-line change to the script.
If you have audio equipment you want to keep using with a modern TV, this guide shows how to make the two work together without interruption.
How the integration works
The architecture is fully local:
TV | | power measured by the plug v Shelly Plug (TV plug) | | LNM status, UDP multicast 239.255.0.1:3333 v Shelly Power Strip Gen4 (AV strip) | +-- Shelly Script av_follow_tv | +-- Socket 1: Bluetooth receiver +-- Socket 2: Amplifier / AV receiver +-- Socket 3: Other device (not controlled) +-- Socket 4: Subwoofer The TV plug measures the power of the TV and sends its status to an LNM group on every measurement update.
The script on the AV strip:
-
Listens for LNM messages from the TV plug.
-
Reads the TV power from the received status.
-
Switches the audio sockets on when the TV power rises above the ON threshold.
-
Switches them off when the TV power stays below the OFF threshold for a set time.
-
Holds the current state while the power sits between the two thresholds.
Two separate thresholds prevent the audio system from flickering on and off when the TV power hovers around a single value.
Requirements
Hardware
You need:
-
1 x Shelly Plug with power metering, for example Shelly Plug S Gen3
-
1 x Shelly Power Strip Gen4
-
A TV
-
One or more audio devices that start working when their power is applied
Note
Check that each audio device turns on by itself when power returns. Many amplifiers and subwoofers have a setting for this, often called auto power, auto standby, or power-on state. A device that waits for a button press after power returns cannot be automated this way.
A plug is the simplest sender, because the TV just plugs into it. The Power Strip Gen4 is a convenient receiver, because it switches each of its four sockets separately.
Compatible devices
The plug and the strip are only one example. The same solution works with any new generation (Gen2, Gen3, Gen4) Shelly device with power metering, the PM devices, as long as it runs firmware 2.0.0 or later.
| Role | What it needs | Examples |
|---|---|---|
| Sender (measures the TV) | Power metering and LNM | Shelly plugs, 1PM, 2PM, Pro 1PM / 4PM, PM Mini, Power Strip |
| Receiver (switches the audio) | Switched outputs, LNM, and Scripts | Shelly Power Strip, plugs, 1PM, 2PM, Pro 4PM |
This means the solution also fits fixed installations. For example, a Shelly 1PM behind the TV wall socket can measure the TV, and a Shelly Pro 4PM in the distribution board can switch the audio circuits.
Firmware 2.0.0 or later is required
LNM was introduced in firmware 2.0.0. Older firmware has no LNM, even on Gen2 or newer devices. Check the firmware of the exact model before you buy or install it.
The script reads the apower value of the sender component. This works for any switch component with metering and for the pm1 component of the Shelly PM Mini. Energy meters report power as act_power (em1) instead, so change that one field name in the script if you use one as the sender.
Software
Both devices need firmware 2.0.0 or later (see Compatible devices), and the receiver runs a Shelly Script. The setup in this guide was tested on firmware 2.0.1.
Network
Both devices must be on the same network segment, on a network without client isolation. Troubleshooting below lists what to check if messages do not arrive.
The devices do not need fixed IP addresses. LNM sends to a multicast group, not to an IP address, so the automation keeps working when the router assigns new addresses.
Plugging in the devices
In the tested installation the sockets are used as follows:
| Device | Socket | Name | Role |
|---|---|---|---|
| TV plug |
| TV | Measured, sent over LNM |
| AV strip | 1 ( | BT receiver | Follows the TV |
| AV strip | 2 ( | Marantz | Follows the TV |
| AV strip | 3 ( | Alexa | Not controlled, always on, so voice control keeps working |
| AV strip | 4 ( | Subwoofer | Follows the TV |
The plug has a single output, switch:0. Socket numbers on the strip start at 1. Component IDs in the API start at 0.
Name each socket in the device web interface or in Shelly Smart Control. Clear names make the script log and the app much easier to read.
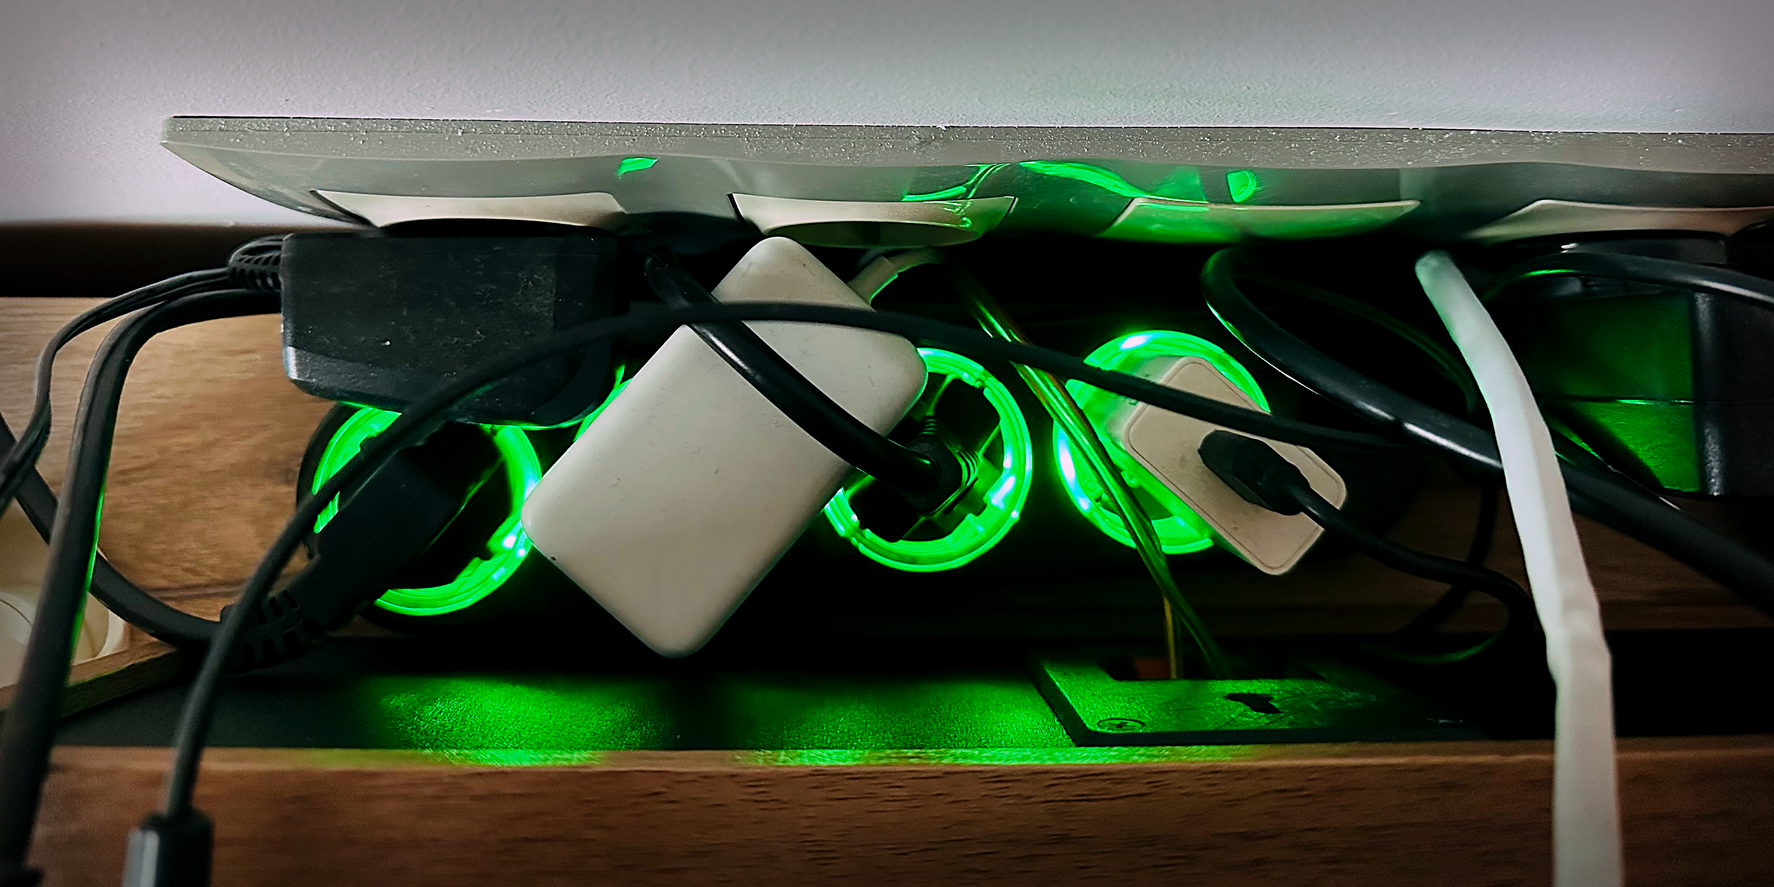
The AV Power Strip in the real installation, behind the TV cabinet. The green rings show the sockets that are on.
LNM configuration
Both devices join the same LNM group. The TV plug transmits, the AV strip receives.
| Parameter | TV plug (sender) | AV strip (receiver) |
|---|---|---|
| LNM instance |
|
|
| Multicast address |
|
|
| TX (Transmit) | Enabled | Disabled |
| TX components |
| None |
| RX (Receive) | Disabled | Enabled |
Use an address in the 239.255.x.y range, and the same address and port on both devices. If you already run other LNM groups, give this one its own address. All LNM settings and RPC methods are described in the LNM component reference.
Configure in the web interface
-
Open the web interface of the TV plug and go to Local Network Messaging.
-
Add an instance with the address
239.255.0.1:3333. -
Enable TX (Transmit) and select the
switch:0component. -
Open the web interface of the AV strip and go to Local Network Messaging.
-
Add an instance with the same address.
-
Enable RX (Receive).
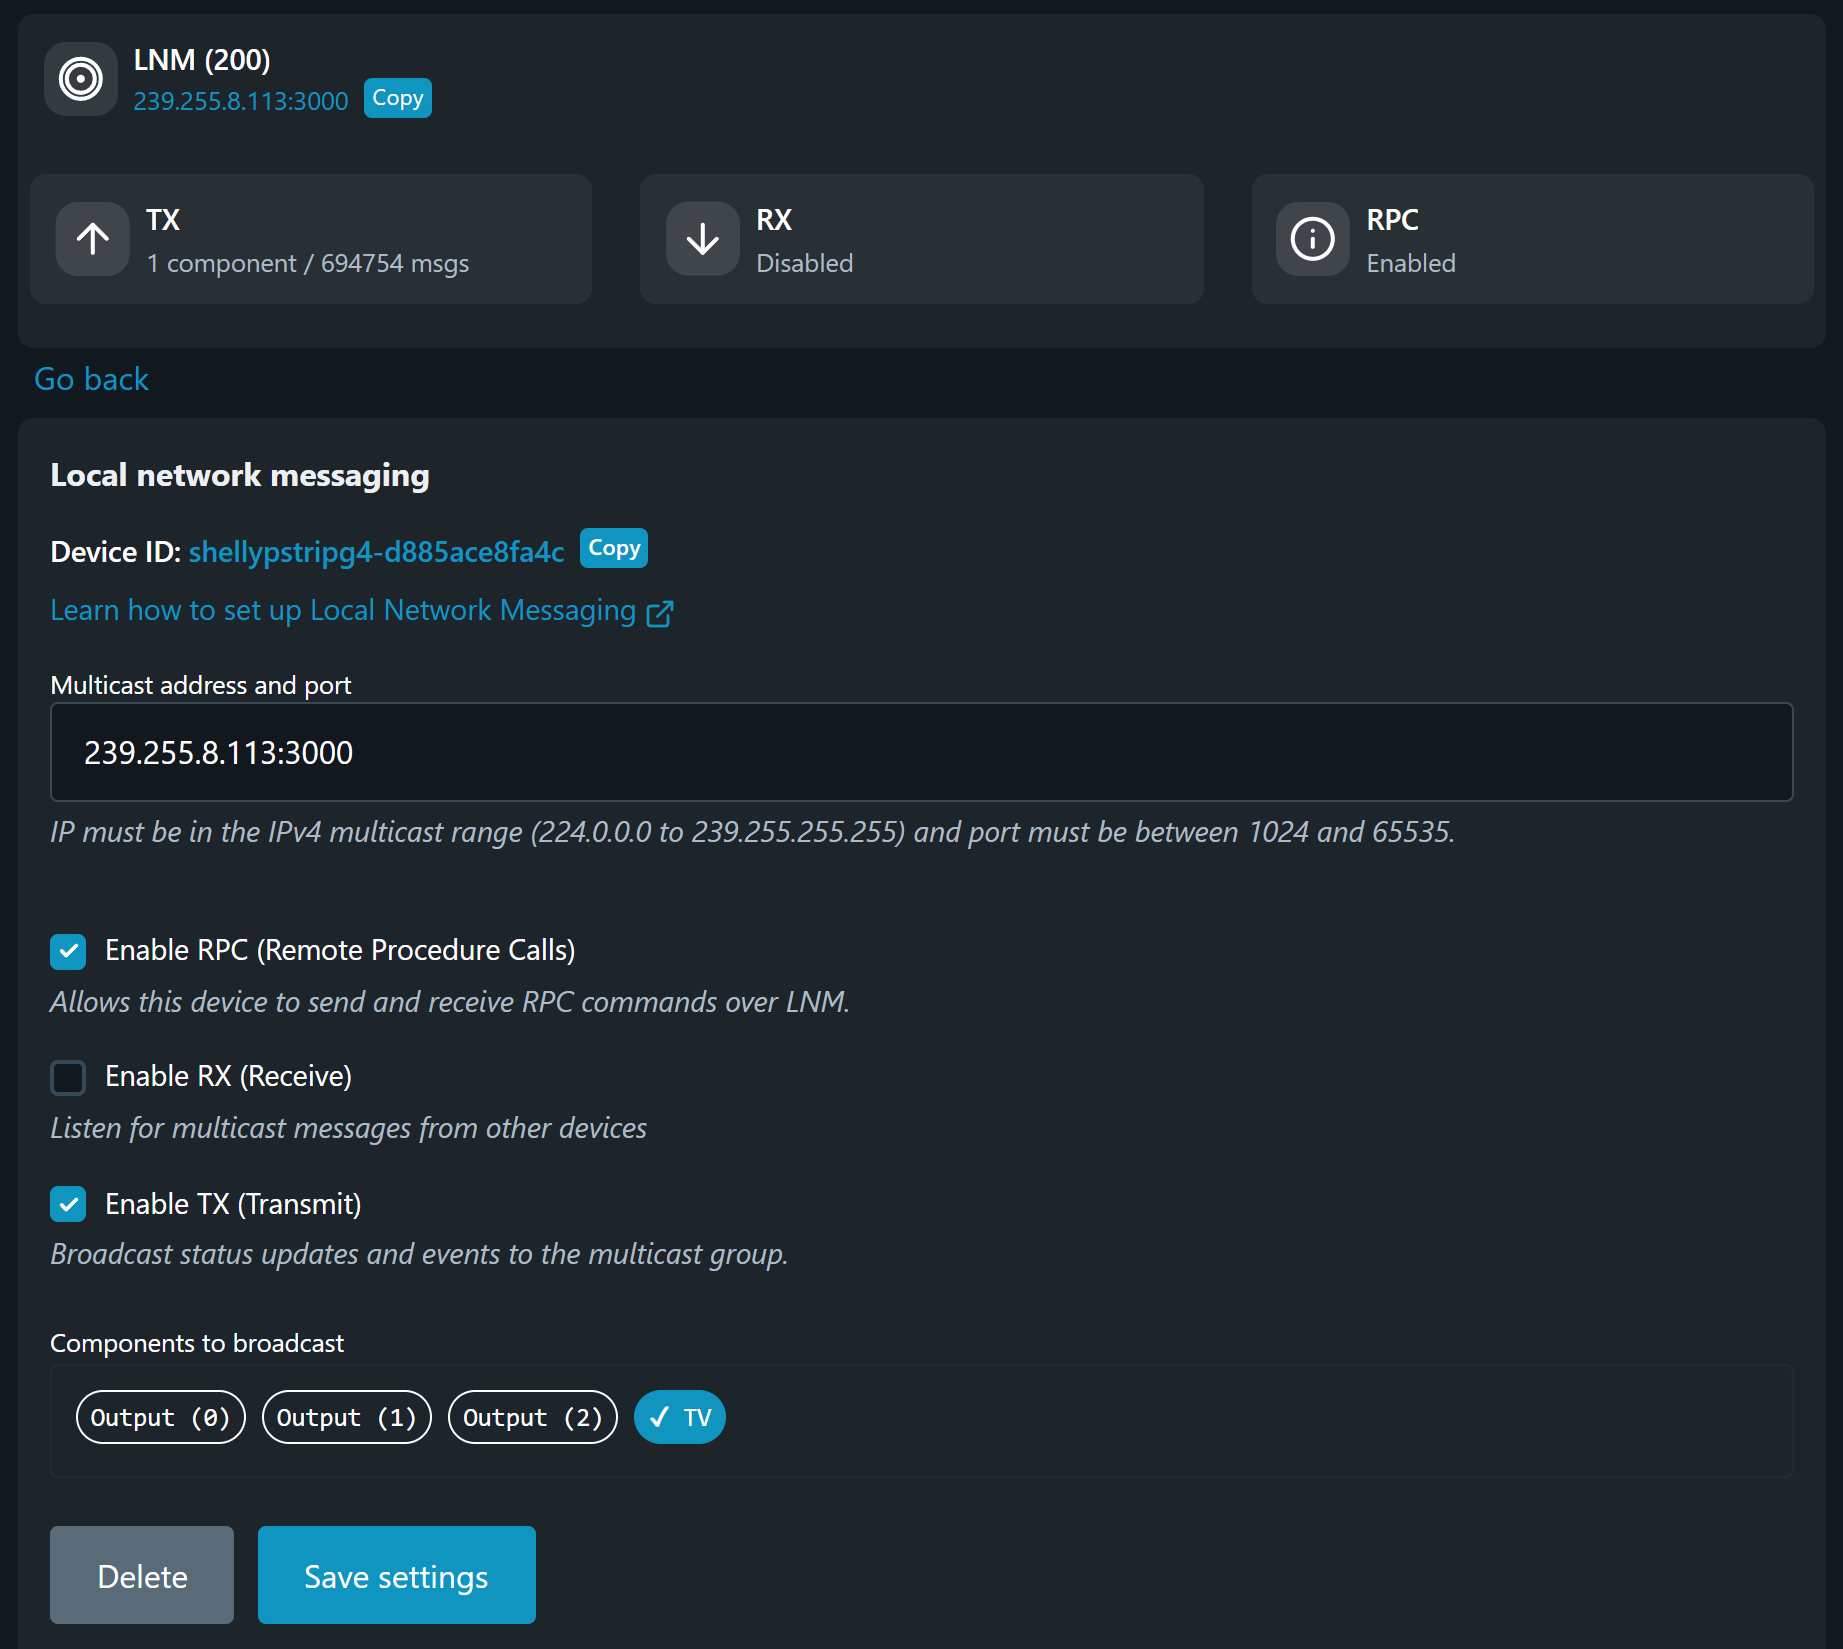
LNM settings on the TV side in the tested installation: TX enabled, only the TV socket selected under Components to broadcast, and almost 700,000 messages sent. On a Shelly Plug the only component to select is switch:0.
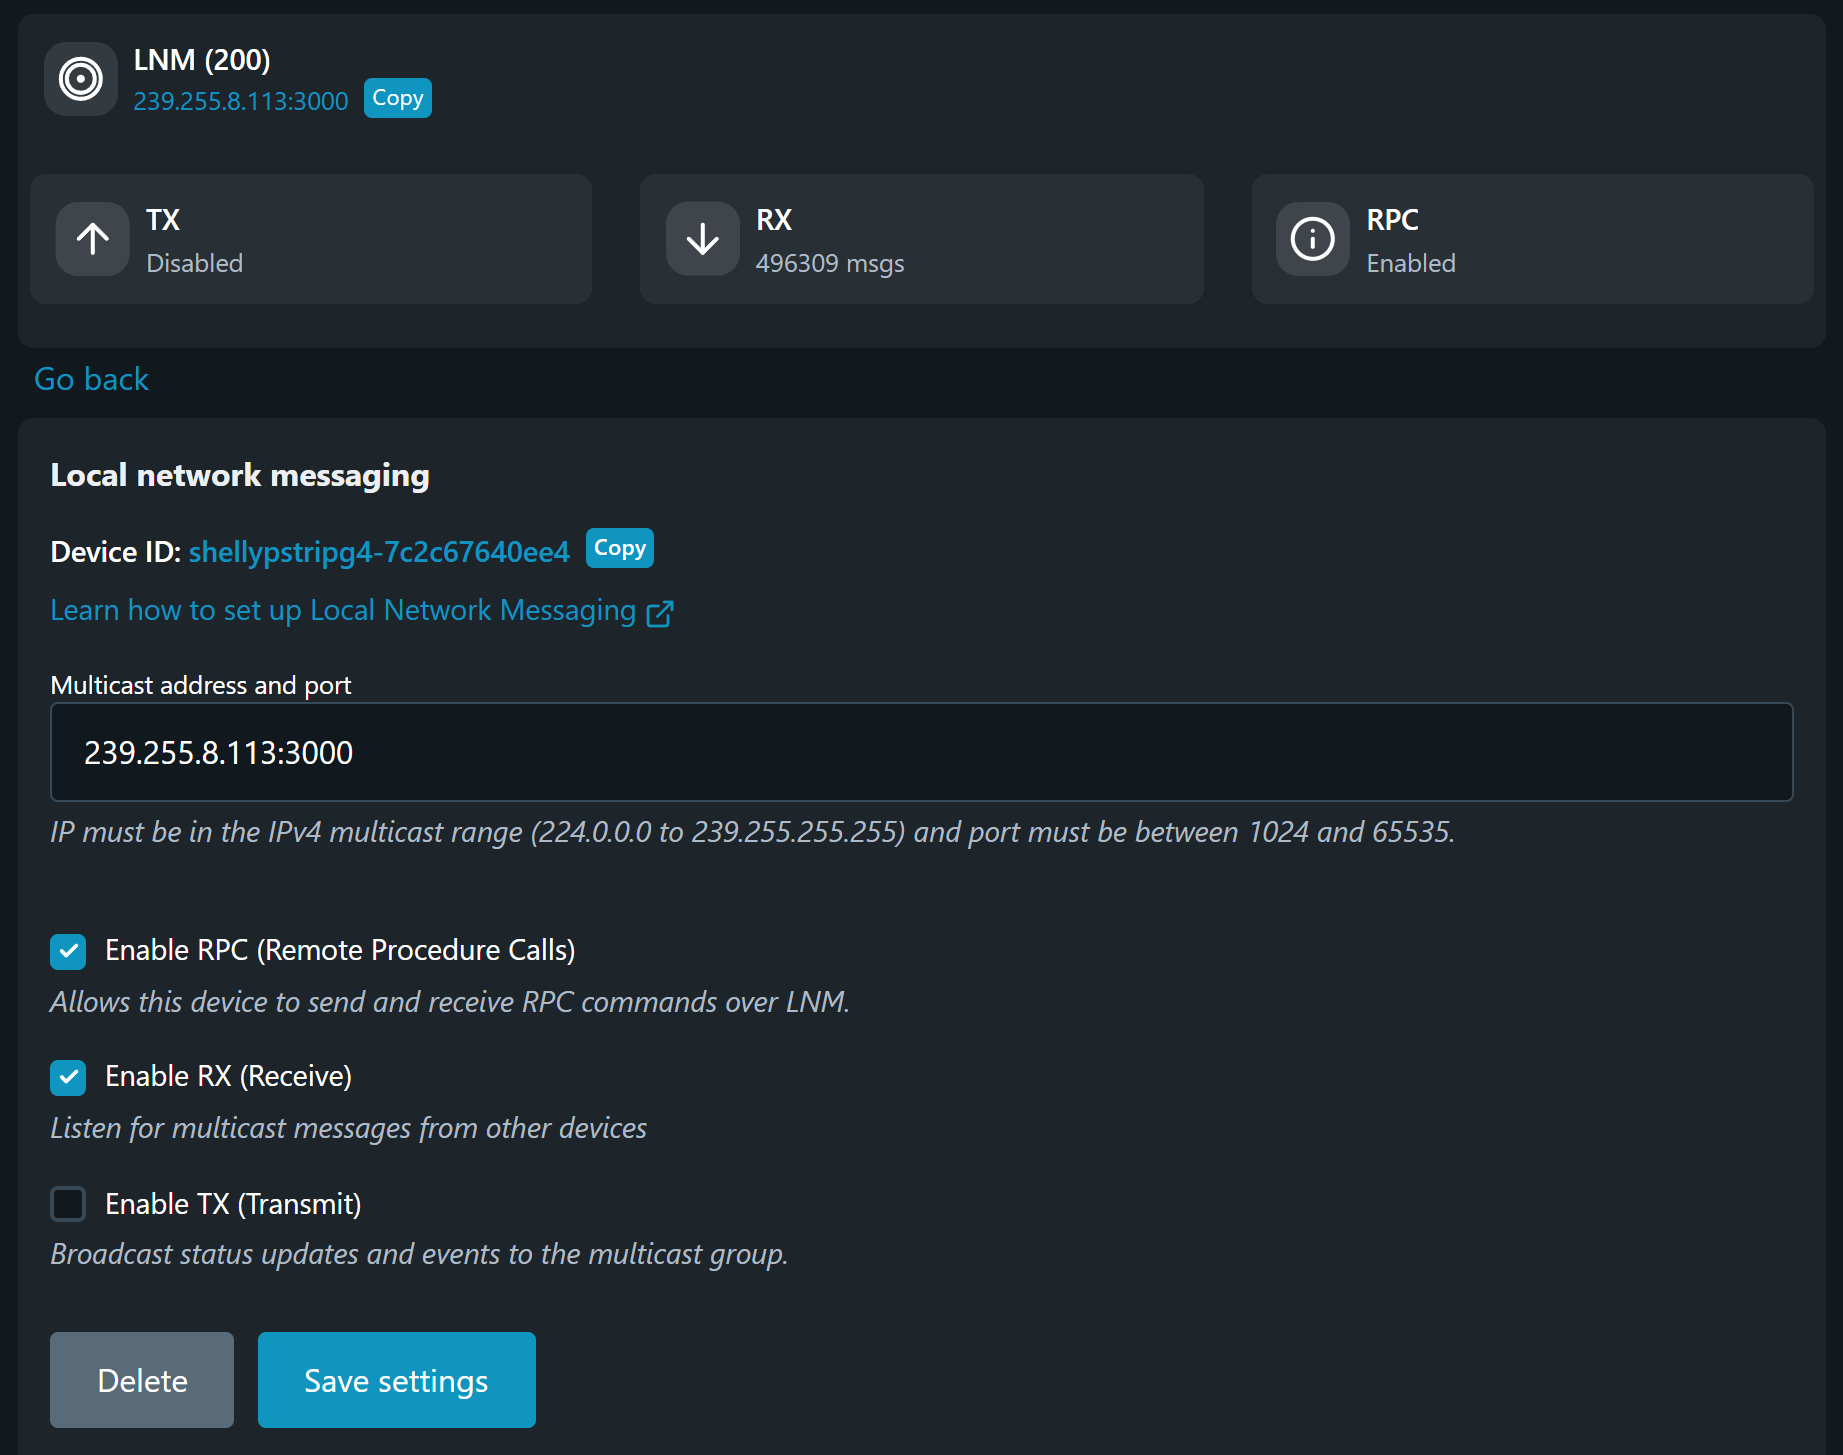
LNM settings on the AV strip in the tested installation: RX enabled and almost 500,000 messages received from the TV side. This installation uses the group address 239.255.8.113:3000. Any address in the 239.255.x.y range works, as long as both devices use the same one.
Configure over RPC
On the TV plug:
http:///rpc/LNM.Create?config={"addr":"239.255.0.1:3333"} http:///rpc/LNM.SetConfig?id=200&config={"tx":{"enable":true,"components":["switch:0"]}} On the AV strip:
http:///rpc/LNM.Create?config={"addr":"239.255.0.1:3333"} http:///rpc/LNM.SetConfig?id=200&config={"rx":{"enable":true}} Confirm communication
Before you install the script, check that the AV strip receives messages. Read the status twice, a few seconds apart:
http:///rpc/LNM.GetStatus?id=200 {"id":200,"stats":{"tx_msgs":0,"rx_msgs":42,"since":1774350141}} If rx_msgs increases, the group works. If it stays at 0, see Troubleshooting below.
Measuring the TV power
The thresholds must separate "TV on" from "TV in standby". Measure both before you choose values.
-
Watch the power of the TV plug in the web interface or the app.
-
Note the lowest value while the TV plays dark content, such as a night scene. This is the lowest on-state value.
-
Switch the TV off with the remote and keep watching for at least 15 minutes. Many TVs stay in a higher "early standby" for several minutes before they drop to deep standby.
Values measured on the tested TV:
| TV state | Measured power |
|---|---|
| On, normal content | 46 to 69 W |
| On, dark content | 38.8 to 41.9 W |
| Early standby (first ~10 minutes after switch-off) | 27 to 35 W |
| Deep standby | 4.8 to 5.1 W |
On this TV the gap between "on, dark content" and "early standby" was only about 3.5 W.
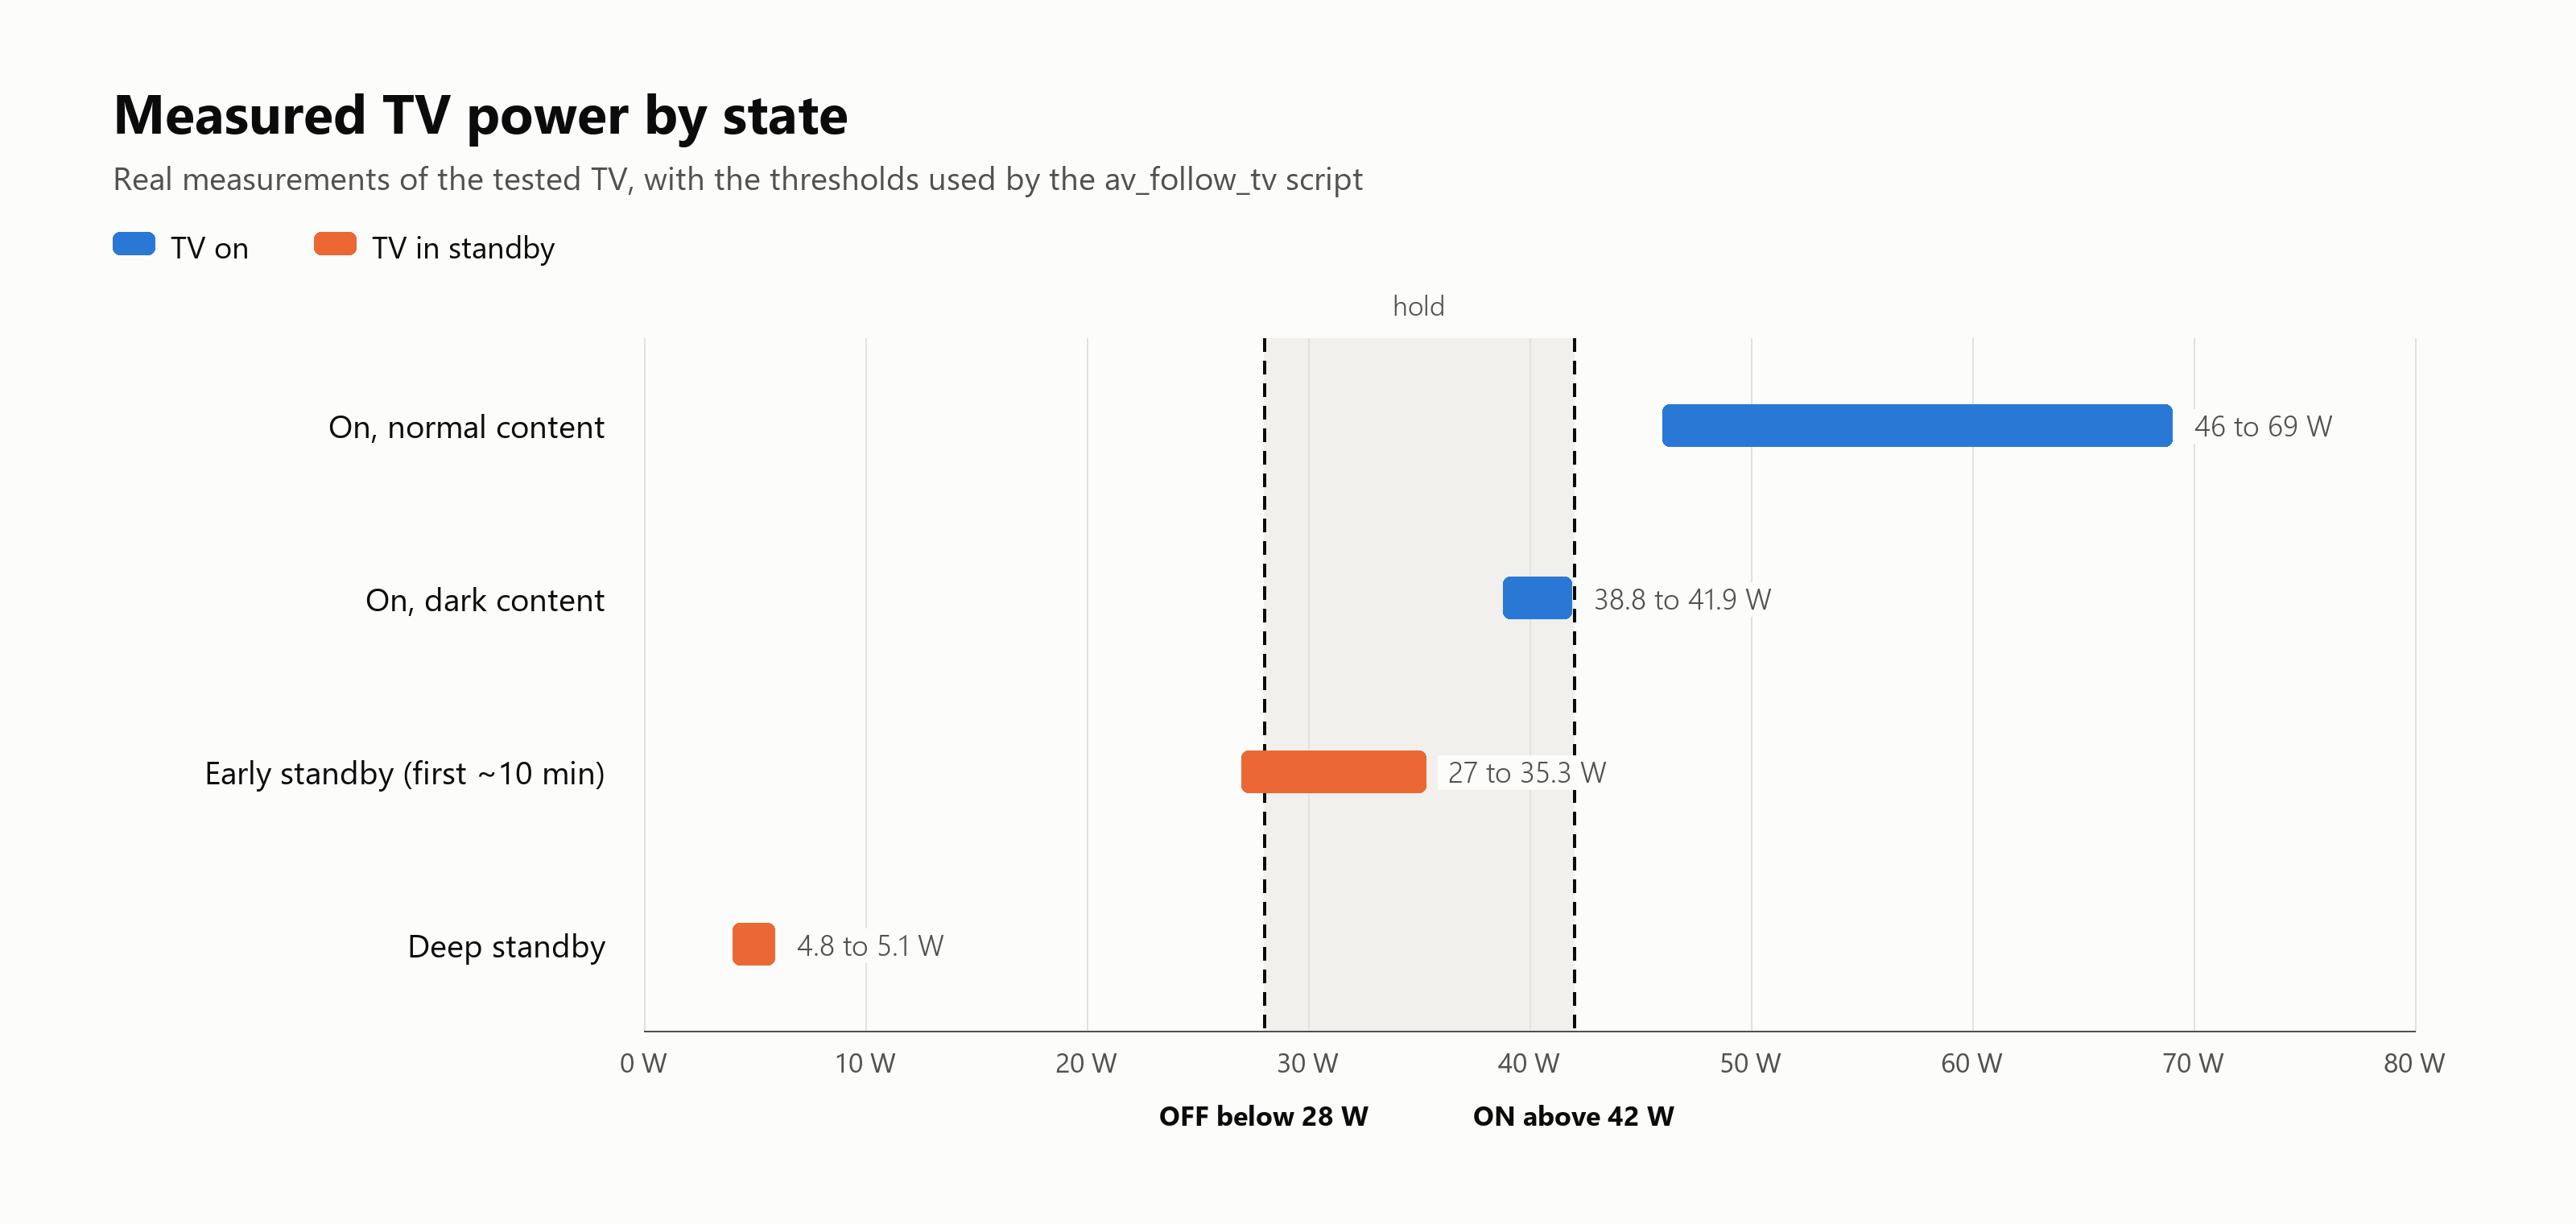
Measured TV power by state, with the ON and OFF thresholds and the hold band between them. Every range comes from real readings of the tested TV.
Choosing the thresholds
| Setting | Value used | Purpose |
|---|---|---|
|
| 42 W | Audio on when TV power rises above this |
|
| 28 W | Audio off when TV power stays below this |
|
| 5 s | How long the power must stay below |
Between 28 W and 42 W the script holds the current state. With these values:
-
A dark scene does not switch the audio off, because the TV stays above 28 W while it is on.
-
After the TV is switched off, the audio stays on through the early standby stage and switches off when the TV reaches deep standby, about 10 minutes later on the tested TV.
-
The 5 second delay restarts on every reading at or above 28 W. Short dips do not switch the audio off.
The trade-off: an offBelowW above the early standby level switches the audio off within seconds, but it risks cutting the sound during dark scenes. Choose the value that suits how the TV is used.
Tip
If the TV can start on dark content (for example, it resumes a film), the power can stay below
onAboveWand the audio does not switch on. In that case loweronAboveWtowards the dark-content value you measured, while keeping it above the early standby maximum.
Installing the Shelly Script
-
Open the web interface of the AV strip.
-
Go to Scripts and create a new script named
av_follow_tv. -
Paste the code below.
-
Set
senderto the device ID of the TV plug. It is theidfield returned byhttp://, for example/rpc/Shelly.GetDeviceInfo shellyplugsg3-a1b2c3d4e5f6. -
Keep
srcKeyasswitch:0for a plug, and settargetsto the audio sockets. -
Save the script, start it, and enable Run on startup.
Configuration
var CFG = { sender: "shellyplugsg3-xxxxxxxxxxxx", // TV plug device ID, "" = accept any sender srcKey: "switch:0", // component to follow on the sender targets: [0, 1, 3], // local switch ids to drive onAboveW: 42, // switch targets ON above this offBelowW: 28, // switch targets OFF below this offDelayS: 5, // sustained seconds below offBelowW before OFF log: true }; | Setting | Description |
|---|---|
|
| Device ID of the TV plug. Messages from other devices on the group are ignored. |
|
| Component on the sender that measures the TV. For a Shelly Plug this is |
|
| Local switch IDs to control. |
|
| ON threshold in watts. |
|
| OFF threshold in watts. |
|
| Seconds the power must stay below |
|
| Prints each decision to the script console. |
Full script
// LNM follower: TV socket power -> AV outputs // // Runs on: the AV Power Strip (receiver). // Listens to the LNM status broadcast by the TV Plug (sender) and // switches the local audio sockets on and off with the TV. // // Schmitt trigger: ON above onAboveW, OFF below offBelowW, hold in between. // Requires lnm:200 on this device with rx.enable = true. // ---- CONFIG --------------------------------------------------------------- var CFG = { sender: "shellyplugsg3-xxxxxxxxxxxx", // TV plug device ID, "" = accept any sender srcKey: "switch:0", // component to follow on the sender targets: [0, 1, 3], // local switch ids to drive onAboveW: 42, // switch targets ON above this offBelowW: 28, // switch targets OFF below this offDelayS: 5, // sustained seconds below offBelowW before OFF log: true }; // --------------------------------------------------------------------------- var applied = null; // last state pushed to the targets var offTimer = null; function log(msg) { if (CFG.log) print("[avfollow] " + msg); } function apply(on) { if (applied === on) return; applied = on; log((on ? "ON" : "OFF") + " -> switch " + JSON.stringify(CFG.targets)); for (var i = 0; i < CFG.targets.length; i++) { Shelly.call("Switch.Set", { id: CFG.targets[i], on: on }); } } function clearOffTimer() { if (offTimer !== null) { Timer.clear(offTimer); offTimer = null; } } function onPower(w) { // anything at or above the low mark cancels a pending OFF, so the delay // only fires on a genuinely sustained dip if (w >= CFG.offBelowW) clearOffTimer(); if (w > CFG.onAboveW) { apply(true); return; } if (w < CFG.offBelowW) { if (applied === false) return; if (offTimer !== null) return; if (CFG.offDelayS <= 0) { apply(false); return; } log("below " + CFG.offBelowW + "W (" + w + "W), OFF in " + CFG.offDelayS + "s"); offTimer = Timer.set(CFG.offDelayS * 1000, false, function () { offTimer = null; apply(false); }); return; } // between offBelowW and onAboveW: hold whatever state we are in } Shelly.addEventHandler(function (ev) { if (!ev || ev.name !== "lnm" || !ev.info || ev.info.event !== "rx") return; if (CFG.sender !== "" && ev.info.device !== CFG.sender) return; var st = ev.info.status; if (!st || !st[CFG.srcKey]) return; var w = st[CFG.srcKey].apower; if (typeof w !== "number") return; onPower(w); }); log("started: ON >" + CFG.onAboveW + "W, OFF <" + CFG.offBelowW + "W for " + CFG.offDelayS + "s, following " + CFG.srcKey); 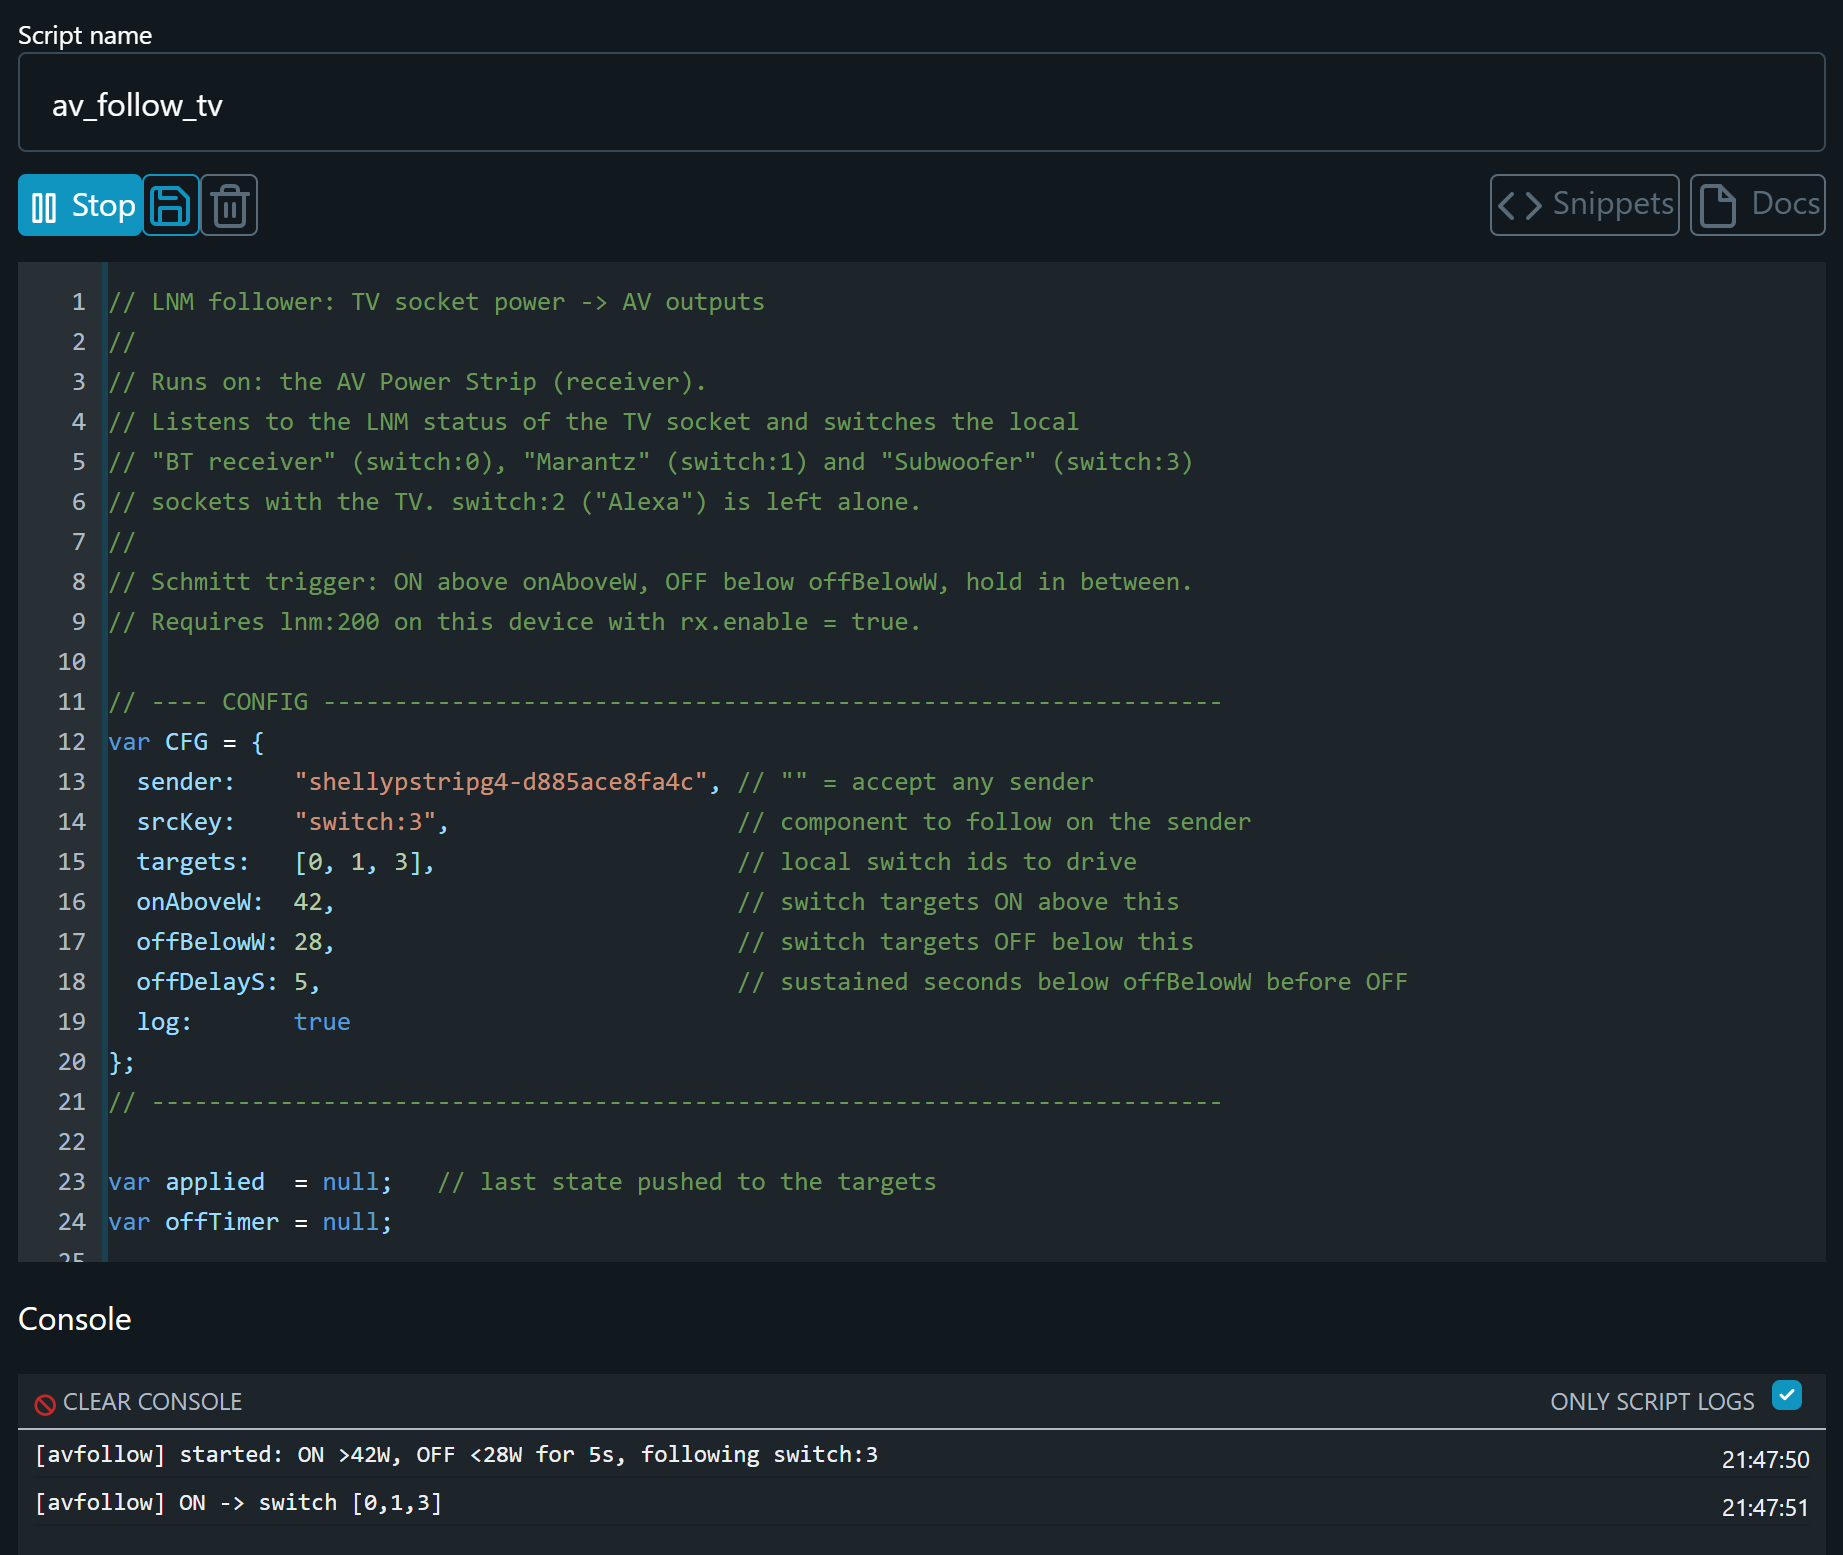
The av_follow_tv script running on the AV strip in the tested installation. Here the TV is still on socket 4 of a second Power Strip, so srcKey is switch:3. The console shows the script starting and switching the audio sockets on.
First startup
When the script starts, the console shows:
[avfollow] started: ON >42W, OFF <28W for 5s, following switch:0 Switch the TV on. Within a few seconds the console shows:
[avfollow] ON -> switch [0,1,3] Switch the TV off. Once the power stays below the OFF threshold, the console shows:
[avfollow] below 28W (5.0W), OFF in 5s [avfollow] OFF -> switch [0,1,3] After a restart, the script does not change the outputs until the TV power crosses one of the thresholds.
Adding another audio device
To add a device, such as a subwoofer, to an existing setup:
-
Plug the device into a free socket on the AV strip.
-
Name the socket in the web interface or the app.
-
Add the socket ID to
targets. For socket 4, change[0, 1]to[0, 1, 3]. -
Save and restart the script.
Devices that must stay on, such as a voice assistant, stay out of targets. The script never touches them.
If you are not sure which socket a device is on, watch the power of each socket while the audio plays. A subwoofer changes its consumption with the sound, while a voice assistant stays at a steady few watts.
Alternative: Actions without a script
For a simple on/off follow without a delay, the AV strip can react to LNM messages with Actions instead of a script.
-
On the AV strip, create a new Action and select the LNM instance
LNM (200)as its component. -
Choose the trigger LNM status received.
-
Add a condition, for example
ev.status["switch:0"].apower > 42. -
Set the action to switch the audio sockets on.
-
Create a second Action with the condition
ev.status["switch:0"].apower < 28that switches them off.
Actions have no OFF delay. A single low reading switches the audio off. Use the script when the TV power drops close to the OFF threshold during normal use.
Manual and voice control
The automation does not take anything away. Both devices stay fully usable in Shelly Smart Control, and the voice assistant keeps working too. Because the audio sockets are ordinary Shelly outputs, you can still say "Alexa, turn off the Marantz" or "Alexa, turn off the sound", for example through the Shelly skill for Alexa or Matter.
A manual or voice command always wins until the TV changes state:
-
Switch the audio off by voice while watching, and it stays off until the next time the TV is switched off and on again.
-
Switch the Marantz and the BT receiver on by voice while the TV is off, for music from your phone, and the script leaves them on.
-
The script acts again only when the TV power crosses a threshold.
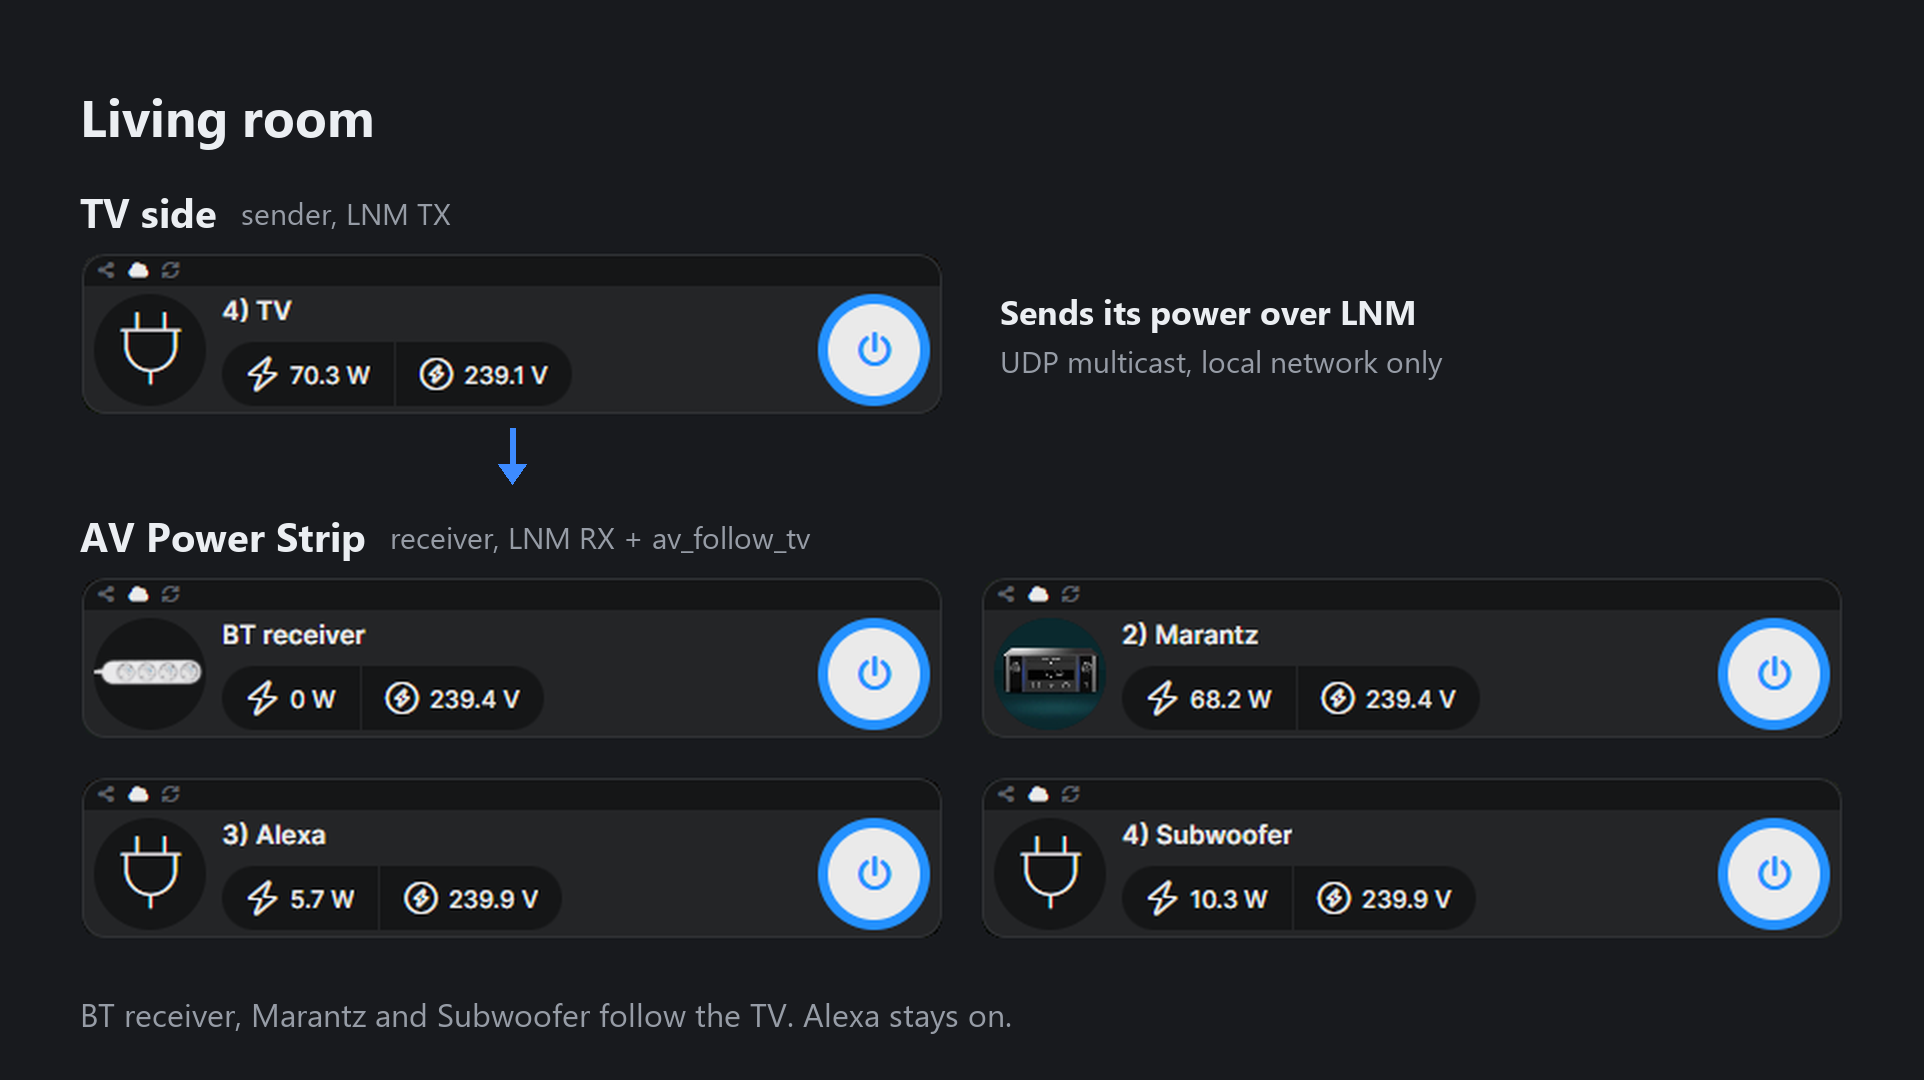
The tested installation in Shelly Smart Control, sockets in order. The BT receiver, the Marantz and the subwoofer follow the TV, while Alexa stays on.
Troubleshooting
The AV strip receives no LNM messages
If rx_msgs stays at 0, the cause is almost always the network:
| Check | Action |
|---|---|
| Same address and port | Compare |
| Same network segment | Both devices on the same Wi-Fi or LAN. Guest and IoT networks are isolated. |
| AP / client isolation | Disable it for the network the devices use. |
| IGMP snooping | With snooping on and no IGMP querier, multicast can stop after a while. Enable a querier, or disable snooping. |
| Mesh Wi-Fi | Keep both devices on the same network name and use a |
Messages arrive but the audio does not switch
-
Check that the script is running and that
sendermatches the TV plug device ID exactly. -
Check that
srcKeyisswitch:0for a plug, or the socket the TV is plugged into on a strip. -
Check the TV power. If it sits between the two thresholds, the script holds the current state.
The audio switches off during dark scenes
Lower offBelowW, or raise offDelayS.
The audio does not switch on when the TV starts
Lower onAboveW towards the lowest on-state power you measured.
The audio stays on for several minutes after the TV is switched off
The TV is still in early standby above offBelowW. This is expected with the values in this guide. See Choosing the thresholds for the trade-off.
A device has power but does not start
The device waits for a button press after power returns. See the note under Hardware.
Safety and limitations
-
LNM uses UDP multicast, and delivery is fire-and-forget. Single lost messages are normal. The TV plug sends updates regularly, so the next message corrects the state.
-
Some amplifiers do not like losing power while on. Check the manufacturer documentation before you switch an amplifier by its mains supply.
-
Stay within the rated load of the plug and the Power Strip.
Result
The TV sound system now follows the TV. Switch the TV on and the Bluetooth receiver, the amplifier, and the subwoofer turn on with it. Switch the TV off and they turn off, while the voice assistant on the same strip stays on.
An older amplifier without HDMI now works with a new TV as if they were made for each other. The audio system has no idea it is being automated, and it does not need to. The app and voice commands work exactly as before.
The final architecture remains simple:
TV plug (power measurement) | LNM, UDP multicast on the local network | AV strip (script av_follow_tv) | BT receiver + amplifier + subwoofer References
-
LNM component reference (RPC methods, configuration, events)


